you might have spent hundreds of rupees to do so, and u may be thinking how good if you can flash your mobile manually.
After you read this article you are done with it, you can flash your mobile whenever your phone(nokia) software is damaged with virus and any other forms..

Step1:- Firstly you need following tools so click the below link to download that.
- Nokia Ovi Suite
- Navifirm
- JAF tool and Pkey(flash tool)
- Dot Net framework 2 or above
Step2:- Install Nokia Ovi suite
install ovi suite and backup your contents like contacts calender etc..In fact, just backup everything because prior to flashing your phone, we need to hard reset it and format your phone memory card to avoid any potential error later on. Hard reset will erase all your contacts, message, phone setting etc. So back them up using Nokia Ovi Suite.
Even if you don’t want to back up your phone, it is essential to install Nokia Ovi Suite for the driver purpose. Otherwise, JAF tool can’t see your mobile phone at later stage.
Step3:- Return Your Phone Software to Its Original State
Reset or format you nokia mobile, go to settings and do complete restoration(reset)
or
Hard Reset
It may happen that despite having restored your mobile to factory settings, the error still exists. In this case, it is recommended that you opt for a hard reset.
Enter the code: *#7370# and press Yes to confirm.
Important: You should back up any important information before doing this.
To perform a hard reset on a Nokia phone that won't turn on, press simultaneously these 3 buttons:
on/off + * + 3
or
Format your nokia mobile by dialling *#7370# from your handset. The device will request a security code, the default code is 12345 unless you have changed it. Formatting will delete all user data from the device memory so always make a back-up of your nokia handset before formatting it.
Dont worry if above method dint worked for you just read below articles because formatting mobile involves diff methods for diff handsets
Step4:- Download Your Phone's Original Firmware
Now we need to download your phone’s original firmware using NAVIFIRM(downloaded from step1). Originally, we flash our phone using Ovi Suite or PC Suite right. This suite automatically detects our phone hardware and software then downloads and installs the relevant firmware for our phone automagically. However, for this one we need to manually select and download the right firmware for our phone.
Extract and run NAVIFIRM. as shown below.

Choose your phone model correctly. As we can see here, there are 3 variant of Nokia 5800XM. The RM-356, RM-427 and RM-428. Different model number use different kind of hardware. So, do not download firmware for RM-427 or RM-428 if your phone model is RM-356. You can check your phone model by typing *#0000#. Look for Type.
‘Release’s is firmware version. Ensure that the firmware you are going to flash into your phone (the one you are about to download using NAVIFIRM now) is newer (or at least has same version number) than the one that already in your phone. Downgrading firmware will definitely brick your phone. You may check with your phone firmware by typing *#0000# too. As for my case, my current phone firmware is 51.0.6. So, I have to download ‘releases’ version 51.0.6 or later (in this case, 51.0.6 is the latest one).
Next, choose your phone variant from d list given in NAVIFIRM for your phone and choose your country market, ex:-APAC1 RED MALAYSIA (0570196) for Malaysia (If you choose country as Malaysia if your from India then your phone language may change to malai , so choose your desired country).
Finally for the files section. Just tick them all. And press “Download from FiRe” button. Save the files into “Your phone model number” folder. If your phone model is "RM-356" then save them into a folder name RM-356 on Desktop.
Copy the whole folder (model name if "RM-356") into “C:\Program Files\Nokia\Pheonix\Products” directory. Or if you are using 64 bit operating system, copy the whole (RM-356) folder into “C:\Program Files (x86)\Nokia\phoenix\products”. Refer screenshot below (omit the RM356-0570196… folder, it was automatically created by JAF when I did flash my phone previously).

Please note that the folder (that store our complete firmware) in “phoenix\products\”needs to be named exactly as your phone’s model number. (If your phone model is "RM-356" name folder as RM-356 ).
And for those who are already panic because they can’t find any phoenix folder in Nokia directory…don’t be. By default, there is none. I manually create the “phoenix” folder and “product” folder..
Step5:- Preparing JAF Tools
JAF Tools(downloaded from step1) is the software that we will use to transfer your complete
firmware into your mobile phone. So, follow the steps below to prepare it. It consist of JAF installation and copy paste 2 files (ini file and PKEY emulator) into JAF installed directory.
Extract “Nokia Flash Tools.rar” (the one you download for JAF and PKey). You will find “JAFSetup_198.62.rar” file, “OGM_JAF_PKEY_Emulator_v 5.rar” and “(.INI FILE)(jaf_nok4models).rar” file. Extract all the 3 files.

Install “JAFSetup_1.98.62.exe” at its default location.
Copy “Jaf_nok4models.ini” and “OGM_JAF_PKEY_Emulator_v 5.exe” into “C:\Program Files\ODEON\JAF” or “C:\Program Files (x86)\ODEON\JAF” if you are using 64 bit operating system.

Then, make a shortcut for “OGM_JAF_PKEY_Emulator_v 5.exe” emulator to your desktop for easy access later on.
Step6:-Flash your phone(transfer firmware into your phone).
If you happen to use Windows Vista or Windows 7 (32 bit or 64bit), you have to change JAF PKey Emulator’s compatibility first. Right click on the JAF Pkey Emulator and choose properties. Click on Compatibility tab and set compatibility mode to Windows XP (Service Pack 3) and set privilege level as Run this program as an administrator as shown in the screenshot below:

Run the JAF Pkey Tool from your desktop.

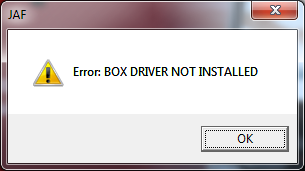
Ensure the setting as in the screenshot above. Then click GO.
An error box will appear. Don’t worry, just click OK button.
Then, JAF will start. Click on BB5 tab.

Ensure that Manual Flash, Dead USB, Normal Mode and Use INI are checked. Uncheck CRT 308.

Then select your phone model. I have to choose RM-356 for mine. Next, click OK.
If you do everything correctly, your JAF will look like as the screenshot below.

All four green circles will light up (MCU, PPM, CNT, APE Variant(if this circle is not lighten up dont worry it depends on your mobile model not all circle will glow for all mobile)).
And ensure the path for the firmware (as in the marked red square) is right
Next, TURN OFF your phone and connect it to the computer USB. (It is recommended to shutdown OVI Suite completely. Right click OVI Suite icon in the tray (if you happen to run it before) and choose exit).
Click on FLASH button.
A warning dialog box will appear, click YES.

Then,(do this properly) press your phone’s “Power Button” for 1 second and release. Just 1 second. Not more. Else your phone will start up. WE DON’T WANT your phone to start up. We just want to allow JAF detect our phone.
Once the JAF could detect our phone, the flash job will start.
Note: Whenever JAF need to detect the phone, press your phone’s power button for 1 second.
Wait for a minute or two until the flashing process is totally completed (indicated by a series of ‘ting’ sound)...And your phone restarts after prosses completion..
OK…it’s done. Enjoy your “new” phone and happy installing new themes, software (unsigned hehehe) etc.
Conclusion
I realize that there are many tutorials around the web that are already cover this topic. I have no intention to repeat the very same things but I found most of the tutorial is not very (total) newbie friendly. Those tutorials are excellent. In fact, I learn how to do this from those tutorials as well. Only at certain part, the authors forgot to explain some basic things which make me sometime wonder…why on earth I have to this and that.
For what it’s worth, I do hope this tutorial would complement other tutorial (if not cover entirely) and prepare the complete firmware to start their journey in flashing their phone. Happy Flashing..